
Return to main Favero Assioma Review
SETUP – Summary
It really is SUPER easy.
The original BePro looked a little daunting when it came to setup but was still pretty simple once you got used to it. The ASSIOMA is REALLY REALLY simple. It’s like changing a bike pedal. As that’s pretty much the basics of what you need to do.
WHAT TO WATCH OUT FOR
I’ll cover this in more detail but the noteworthy things you need to do are: download the app to register the pedals; ensure the main body of the pedals is kept away from your cranks with the spacers provided; double-check that your cleats or bike shoes never touch the pedal’s circular black pod; and be mindful about calibration.
Unboxing, Box Contents, Weights & Dimensions
It’s a quality box. Even the box is just slightly improved on the previous model.

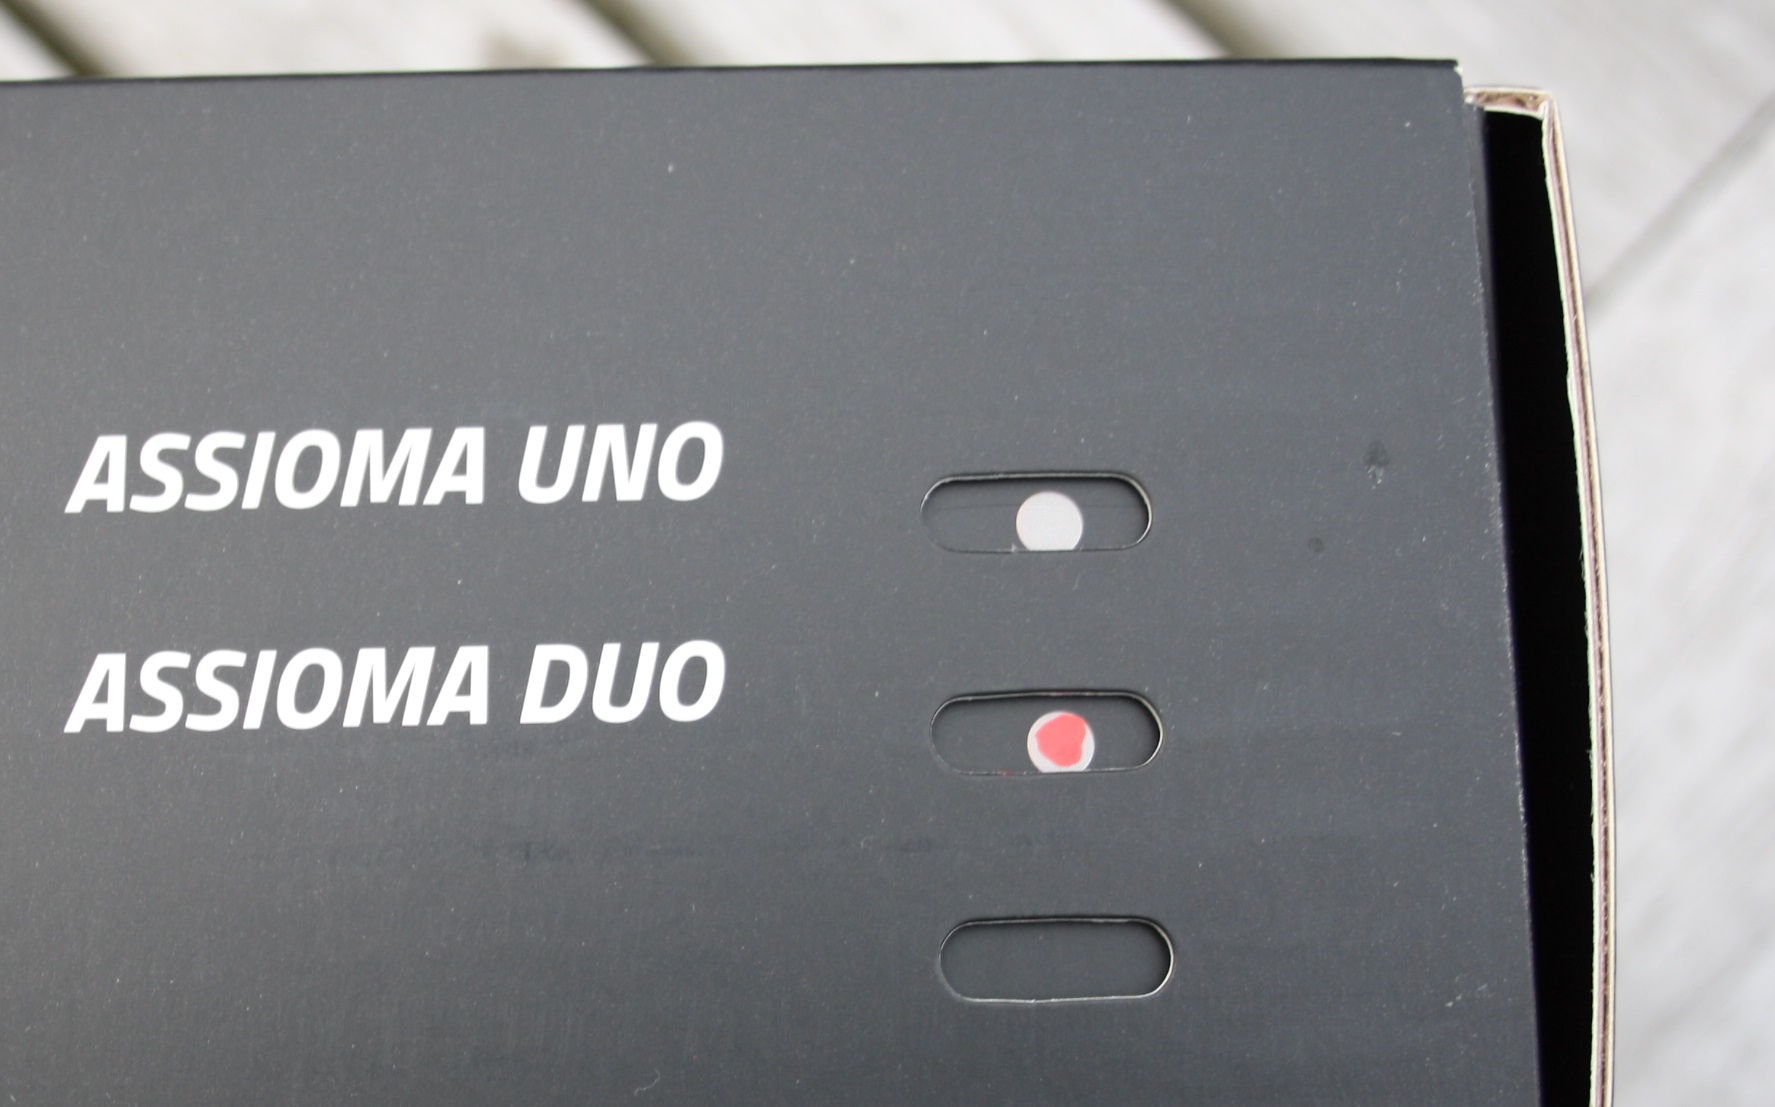
Some packaging is saved by enabling the box and sleeve to cover both models of the ASSIOMA (ASSIOMA UNO and ASSIOMA DUO)
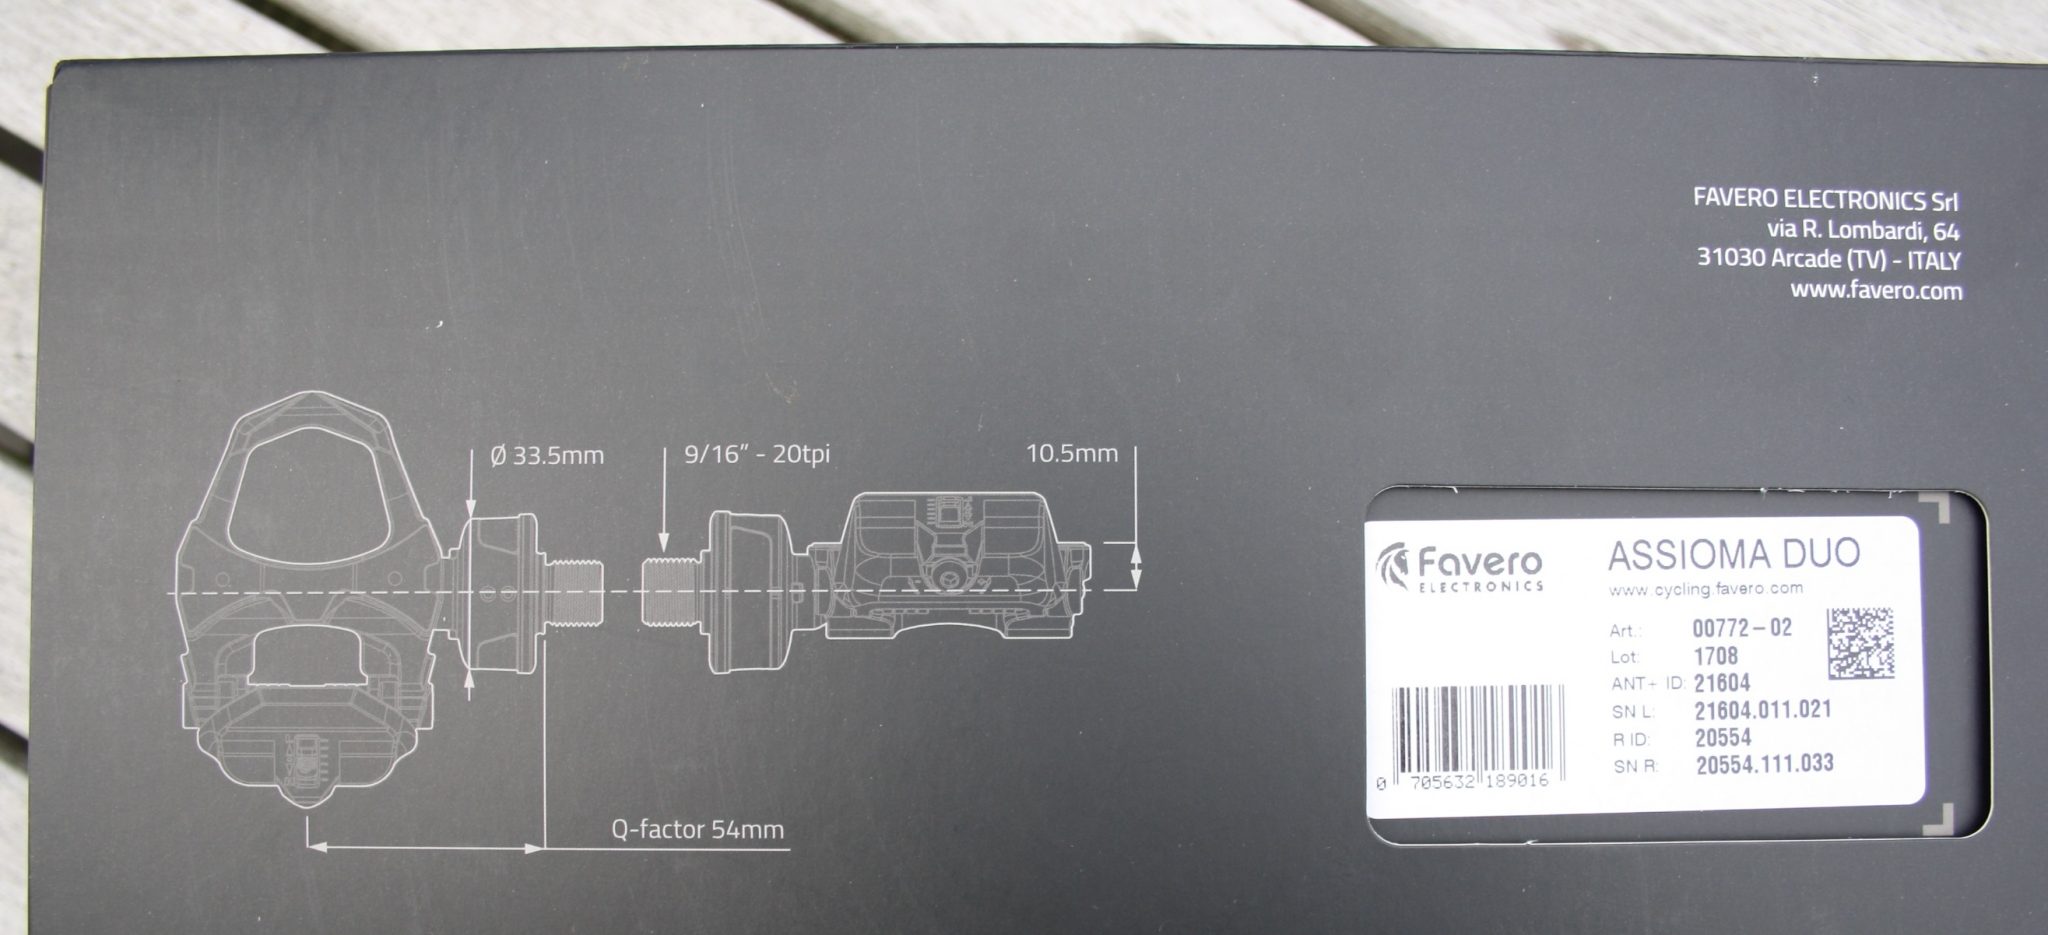
The box sleeve has some summary dimensions (we’ll come back to the Q-factor) as well as your ANT+ ID. Most of you won’t really need to know that even when it comes to pairing. but, if you have a room full of ANT+ power meters, then knowing the ID might help, I suppose.
It’s re-assuring to open the box and just see the two pedals. Your first thoughts should be “yeah, I can put those on my bike…no problems“.
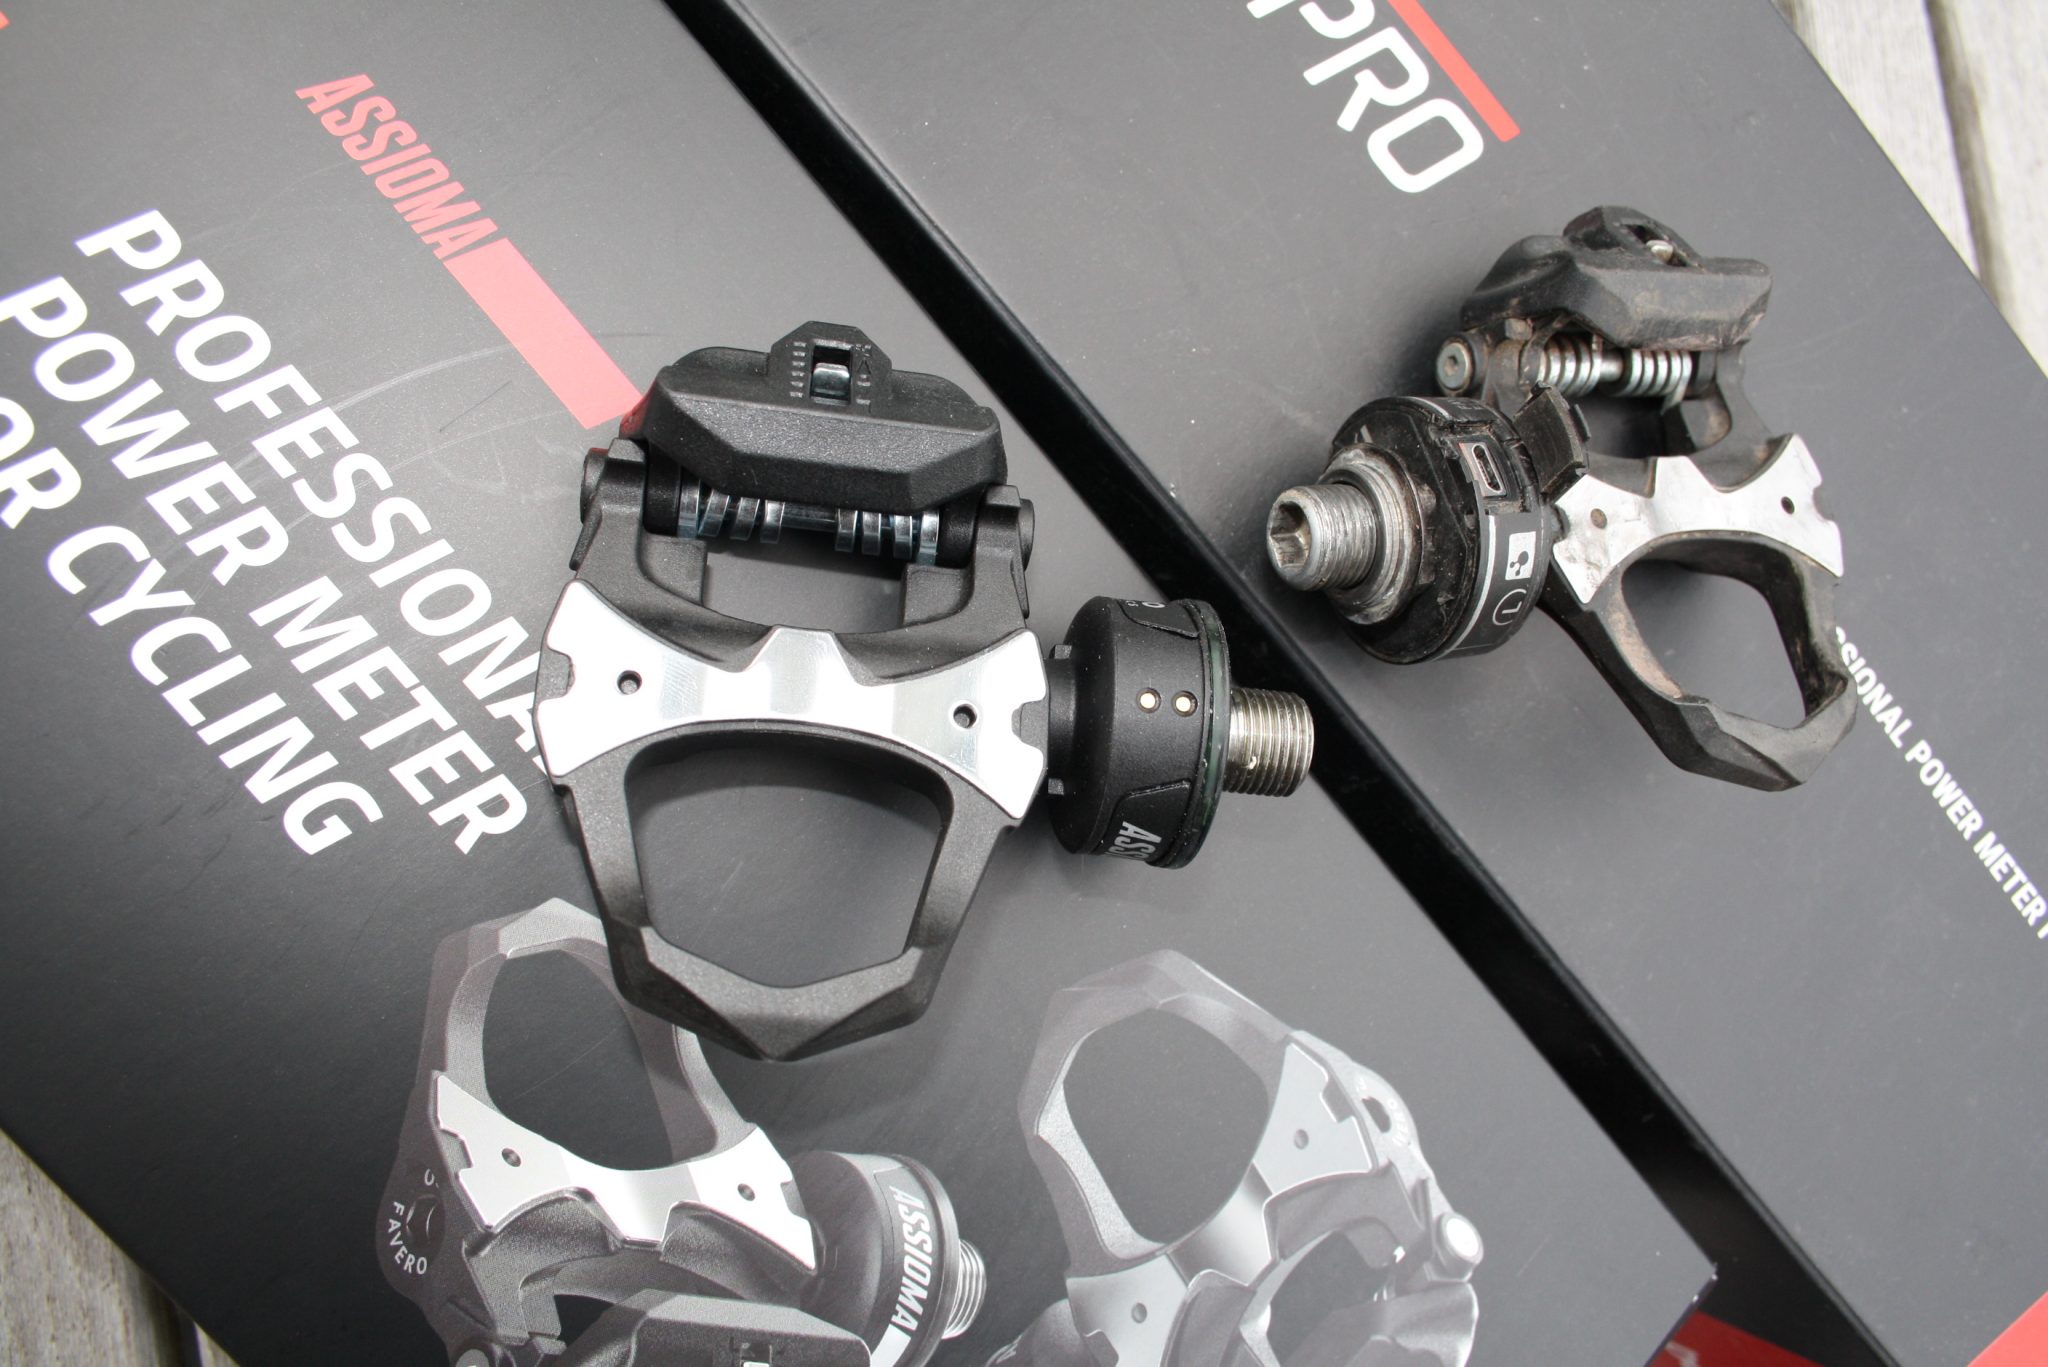
They look and feel well-made. Before I delved to the bottom compartment of the box I quickly compared the pedals to the previous model (BePro). The point of doing this here is just to shown that several small details have been improved. The only apparent differences are that the ‘circular black bit’ has changed. It looks slightly better made than the earlier BePro. Also, most obviously, is the different charging port – gone is the plastic covered micro-USB port and in comes two magnetic connecting points. The charging changes are a notable improvement and might help extend the longevity (although after 2 years my original BePros are going strong). I assume that the strain guage is inside the spindle and that the battery and transmission are I the circular black bit. There are bearings between the spindle and pedal – FYI I had a go at changing them on the earlier BePro and it was relatively easy – the ASSIOMA should be similarly easy as it looks the same although it should be a LONG time before the bearings need changing (years – I just fiddled with them as I was bored).
Ah. Looking into the bottom compartment of the box shows us all the other goodies. You get: some cleats (to all intents and purposes they are LOOK/KEO compatible); two proprietary USB charging cables (one attached magnetically, the other shown loose); a dual power adapter for your country (not shown); an allen/hex wrench/key; 4 washers/spacers; and lots of bits of paper that you will never, ever read.

Not sure about the cleat? Have a look (pun) at this:

So, it’s nearly as simple as ‘just put the pedal on’ and do it up ‘fairly tightly’. You use the large hex wrench to tighten.
Oh, here’s the power adapter I forgot to show earlier. It lights up to show you have turned the wall socket on! and it’s handy that both USB cables can be attached with just the one wall socket. Equally you could charge from a computer I suppose.

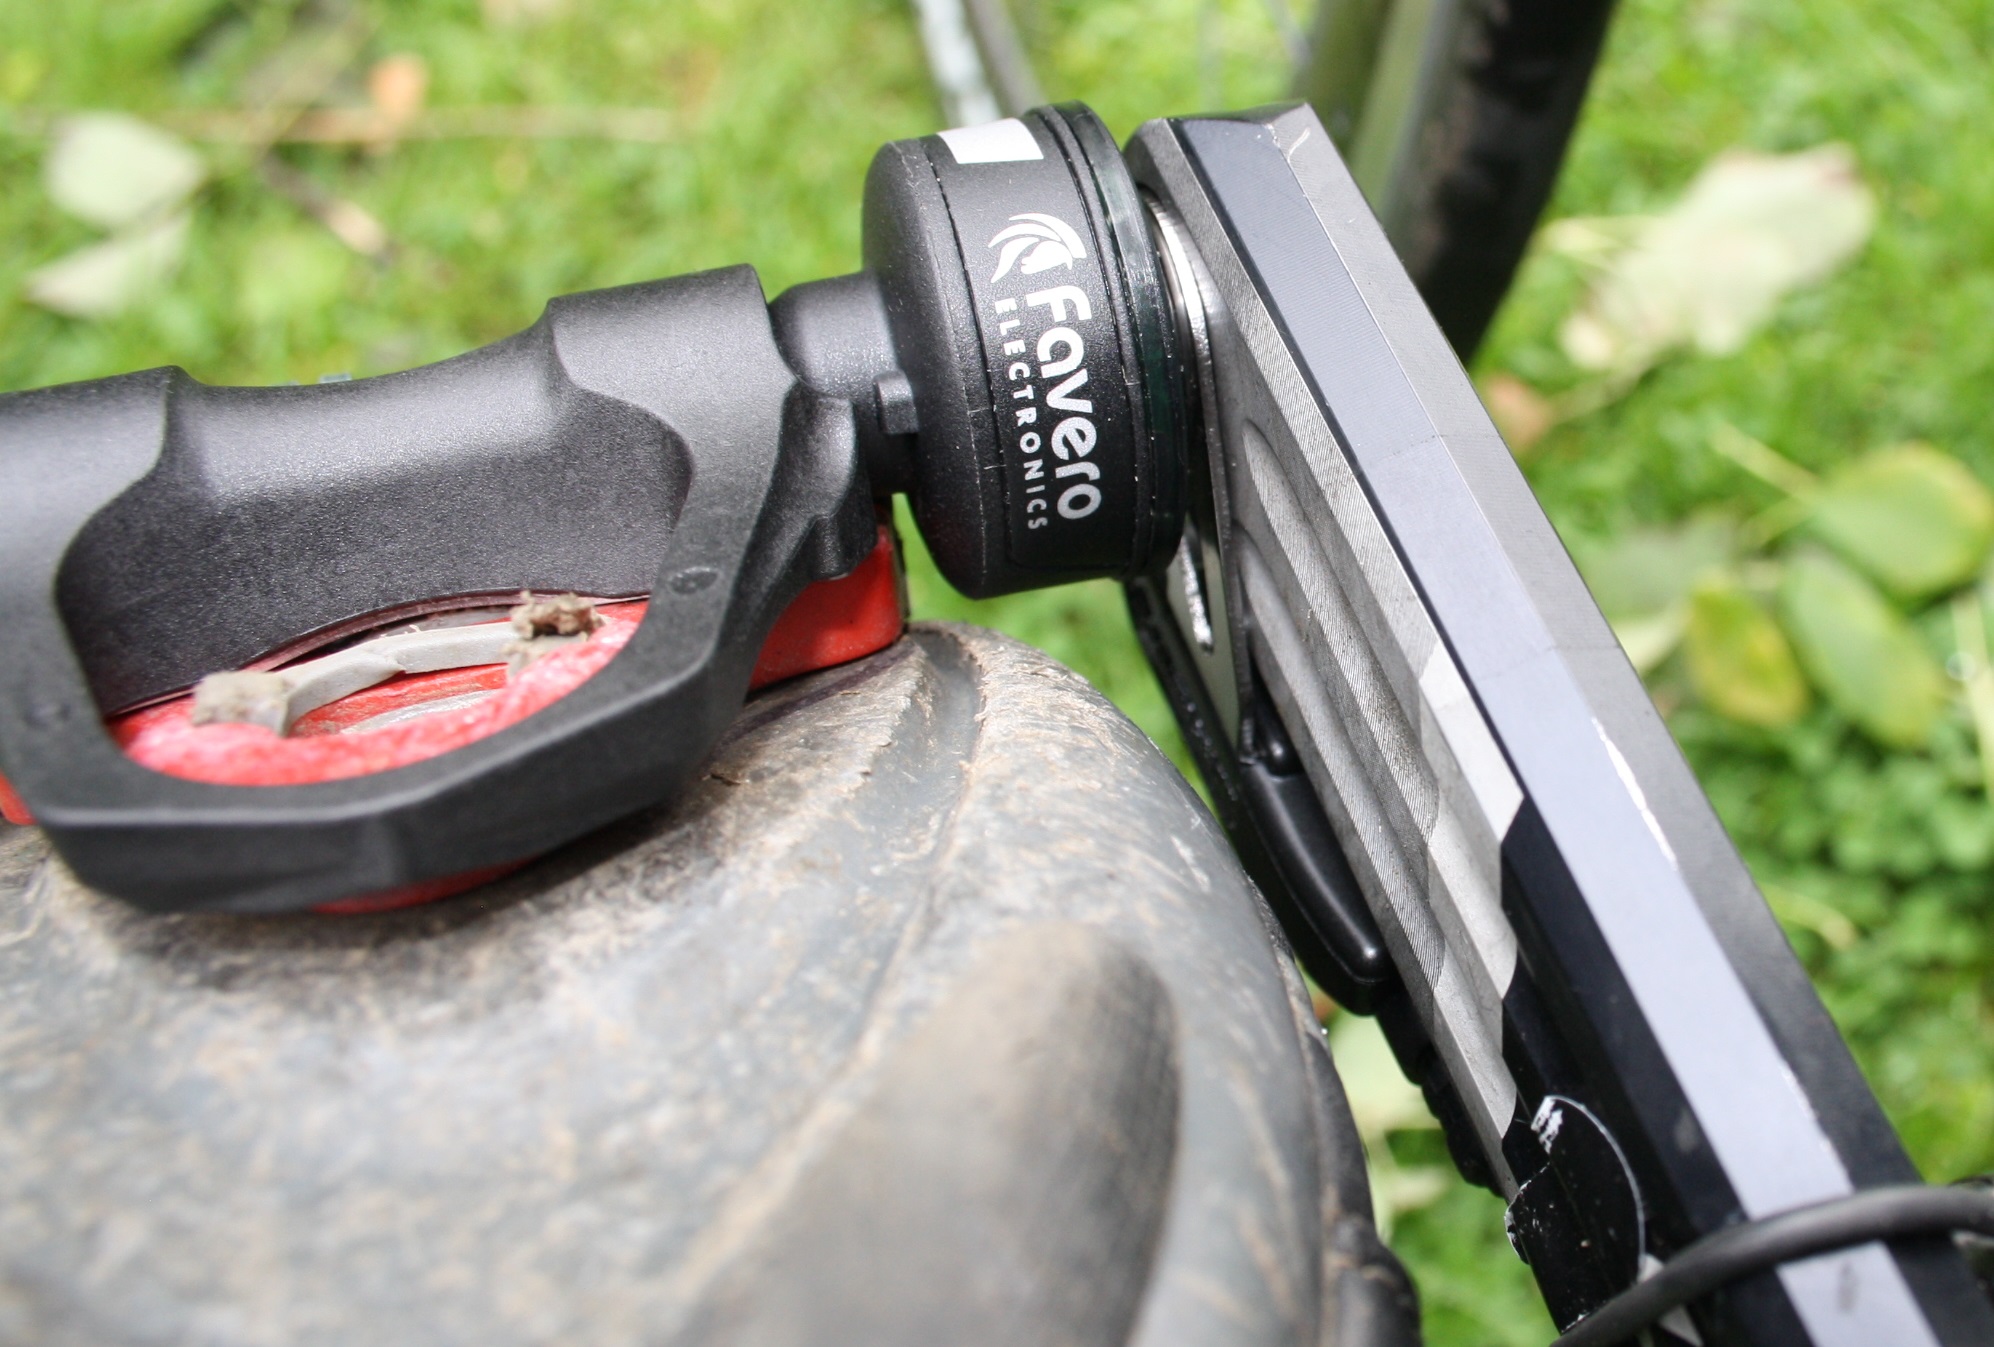
CAUTION: The circular black pod MUST NOT TOUCH YOUR CRANK – in that scenario, it might cause damage if you over-tighten and even if damage is not caused your power readings will likely be wrong.
Add a washer or two to keep the crank and pedal pod/housing apart. It doesn’t matter how many washers. More washers is for the more cautious power meter pedal installer.
![]() TIP: Once you have put the pedal+washers onto the crank, take another washer and see if it can fit into the gap between the crank and pedal housing/pod. If it easily fits into the gap then you have one washer too many.
TIP: Once you have put the pedal+washers onto the crank, take another washer and see if it can fit into the gap between the crank and pedal housing/pod. If it easily fits into the gap then you have one washer too many.
I found that I needed one less washer with the ASSIOMA than with the BePro. The reason for that is a subtle change to the threaded part of the pedal which seems to include a degree of engineered ‘spacing’ in the design Ie on the diagram above you can just about see the “built-in 1mm spacer“.
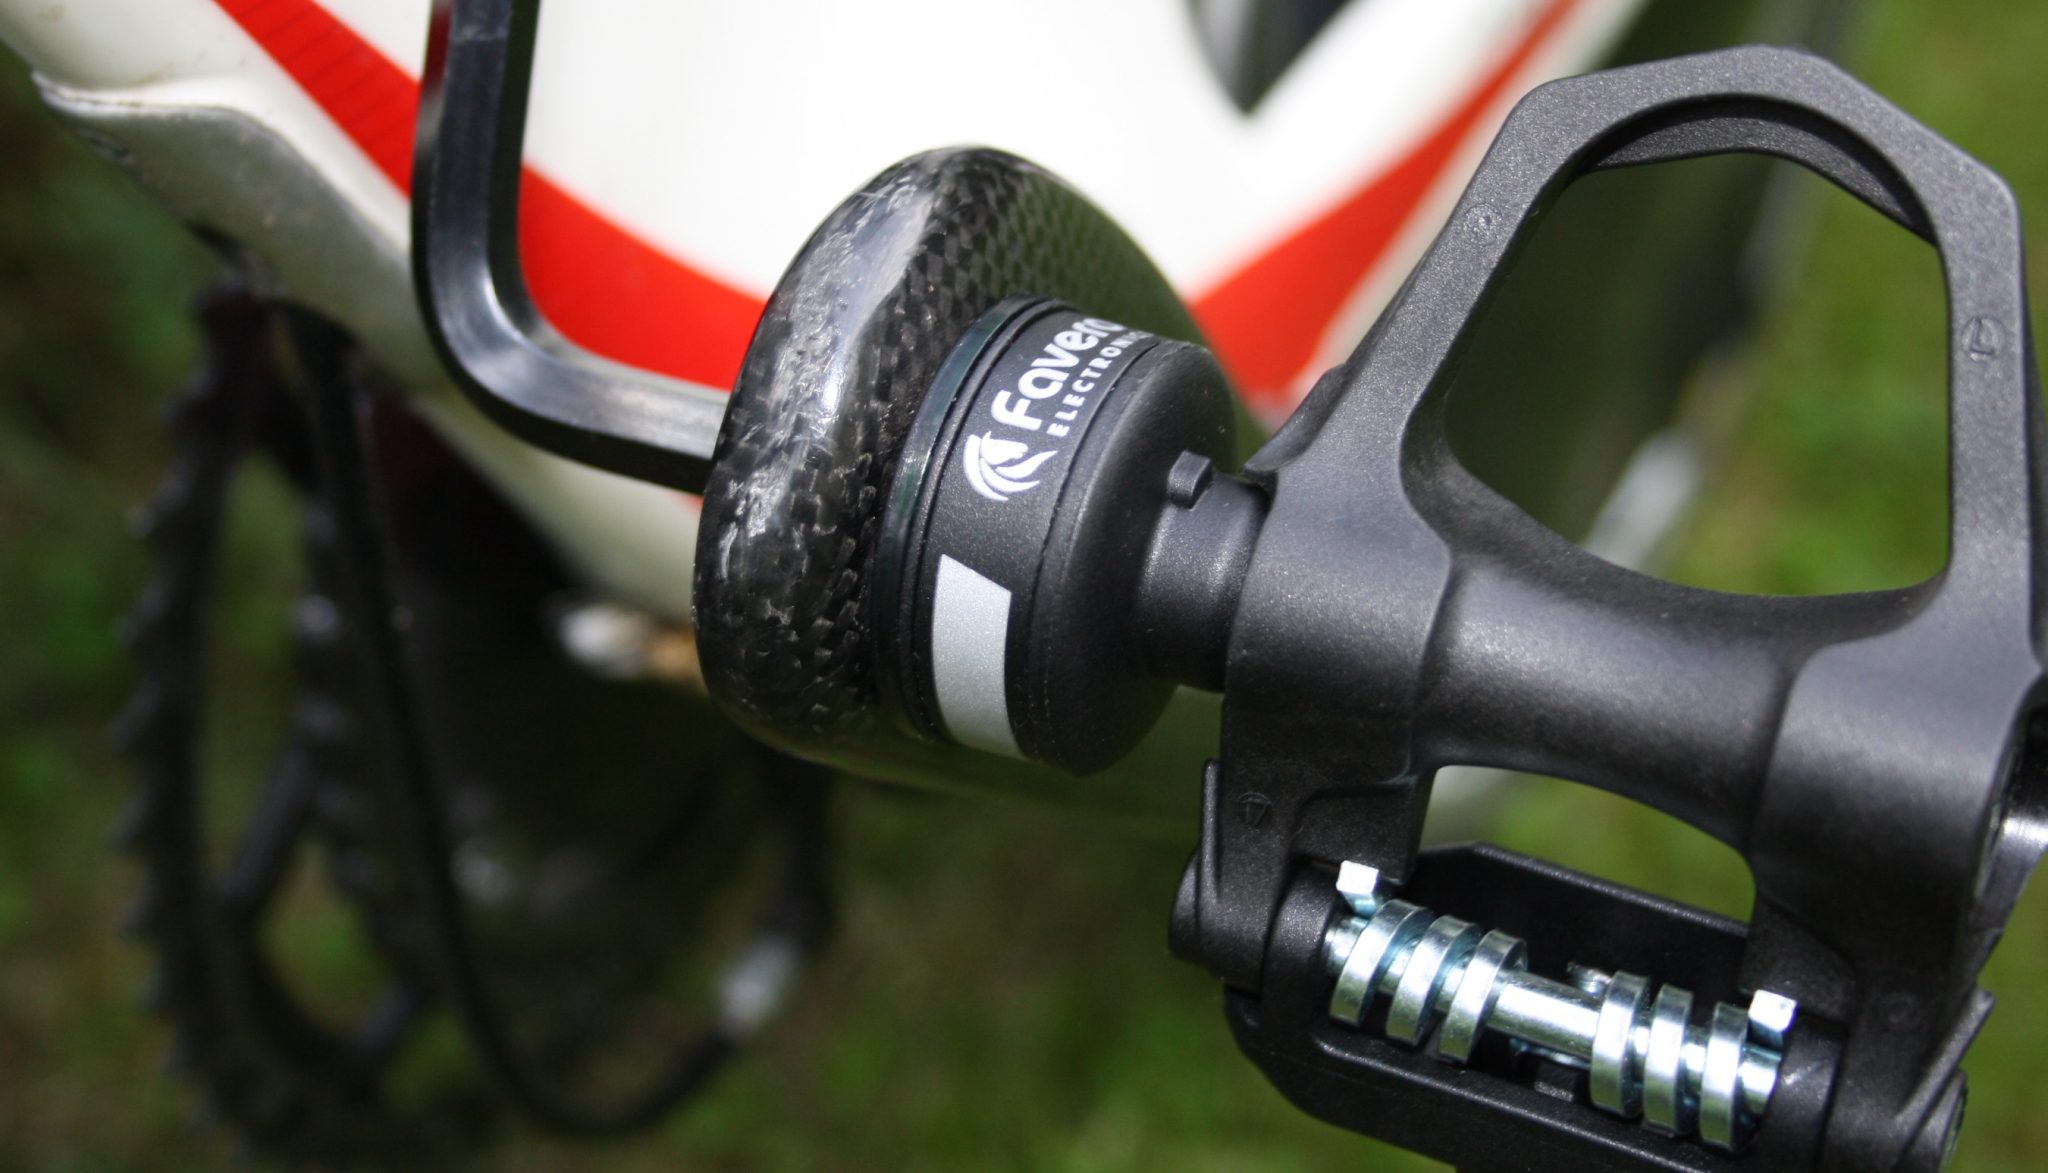
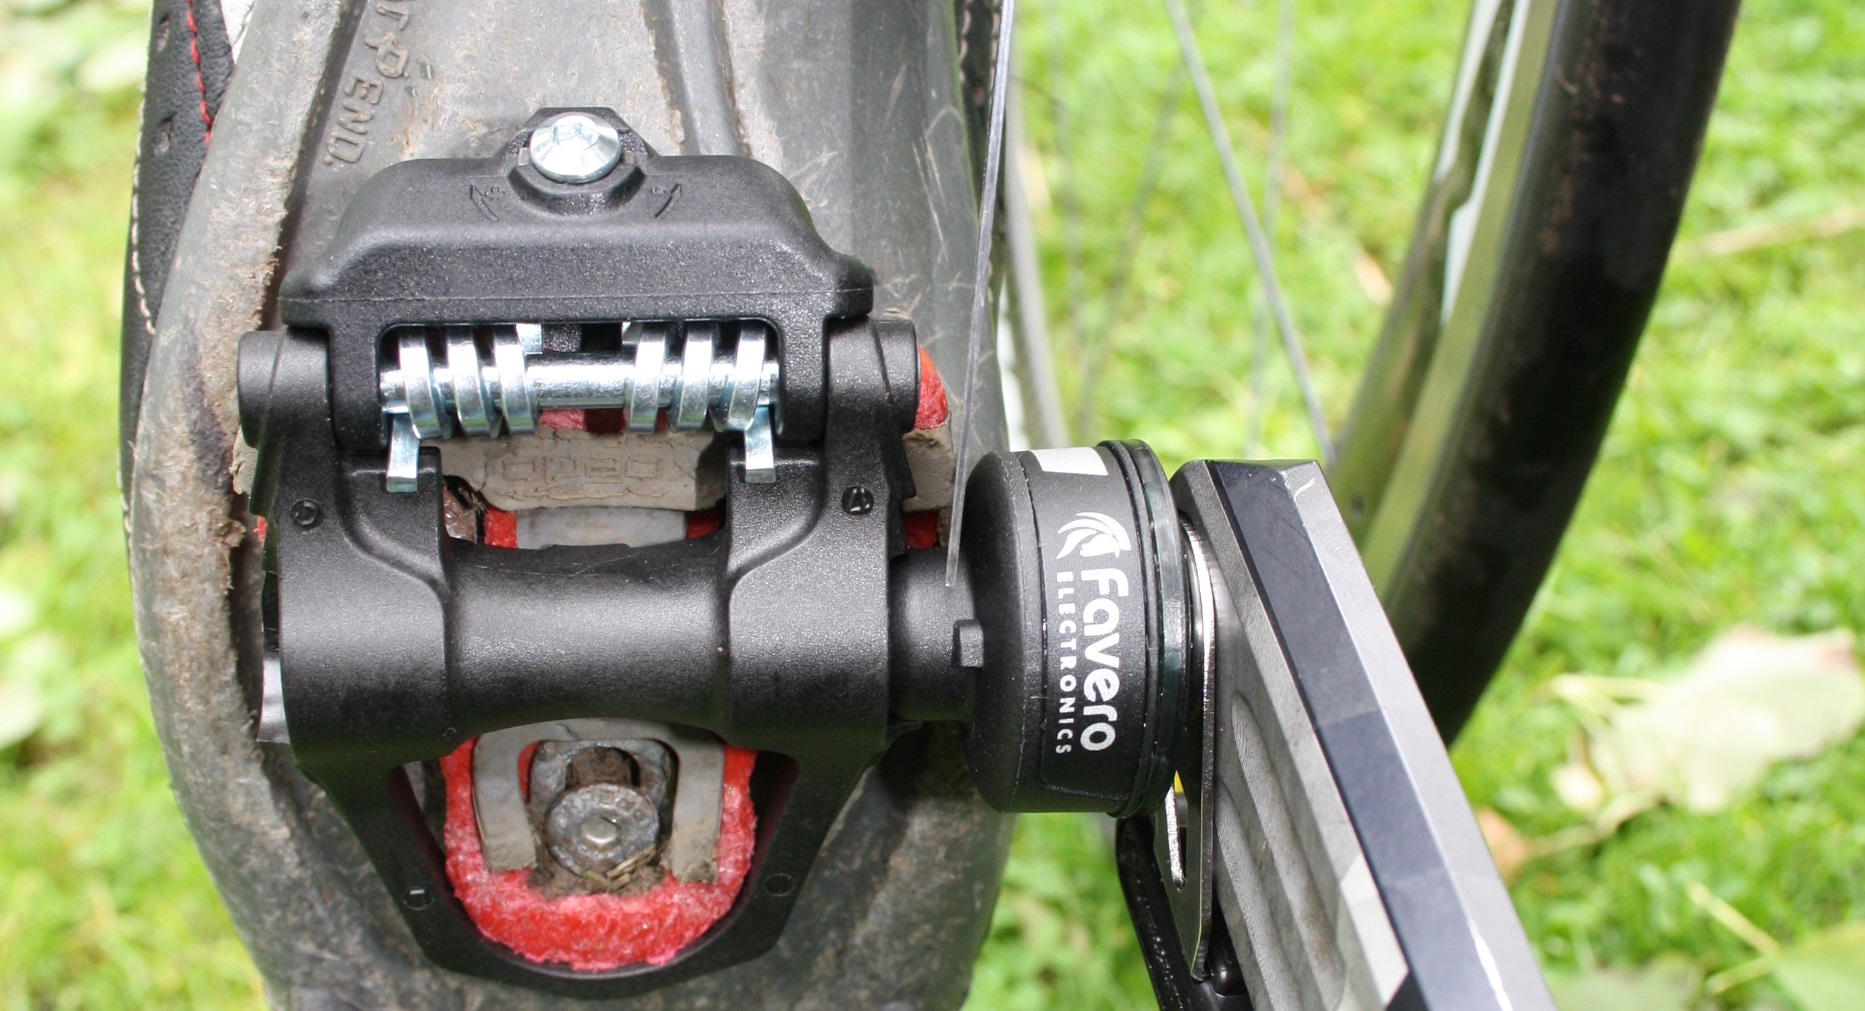
From another angle all you still have to do is put the pedal on. You can only say that so many ways (one way).

CAUTION: One final check is required to ensure that your bike shoes (or cleats) NEVER touch the circular black pod part of the pedals. If they touch or if there is not 2mm clearance then you should buy some ‘shims’ (spacers) OR file/shave some plastic from your bike shoes. You should then probably increase your seat height by the same distance as the shim width.
![]()
The diagram above is fine. But as you can see below the real-world situation even with a standard pair of specialized bike shoes is that clearance is TIGHT in my case. There is about 1mm clearance from the cleat to the pedal AND about 2-3mm clearance from the shoes to the pedal. Which is fine it will work perfectly.
Consider: What happens as time passes. You will walk on your cleats and they will fray and perhaps spread a little on the parts on which you have walked. The CLEATS may well then touch your pedal. It’s simple enough to file/cut the cleats but just be aware that this might happen down the line.
Installation done. Box ticked.
ACTIVATING
Activation is unusual but becoming more common with sports electronics.
Without activation the pedal wont work as a power meter. Activation also starts your warranty. It’s a nice way of doing it I suppose. They could have slightly improved this one-off process by using the QR code, which appears to be on the outside of the box. FWIW: WAHOO and WATTEAM make use of the QR code in their registration process.
Here is a slideshow showing you what to do but it’s simply: install the app; pair each pedal; and then activate each pedal. Keep the app as you use it to update firmware and ‘advanced settings’.


PAIRING
 We now have a fully working power meter we just have to let devices communicate with it. Any number of ANT+ devices can simultaneously read the power information. ASSIOMA also supports Bluetooth Low Energy (BLE) 4 and with BLE head units, it’s just one active pairing that’s possible.
To check: I will clarify these
- One Bluetooth head unit and many ANT+ headunits should all be able to be attached simultaneously
- Some Bluetooth head units and watches may only take one Bluetooth channel and double it. You might want to make double sure with your device as it would be pointeless buying the dual-sided ASSIOMA version (DUO)
- Although only one active BLE connection is possible it should be possible to have also paired to other head units and to use that paring again on a future ride.
Pairing will vary depending on your cycling computer or sports watch. It should be pretty much the same process as adding a new heart rate monitor. The only complication will be if there is more than one device found…but then you look on the box to find the ANT+ ID and select that one on your watch. You know the routine, I’m sure.
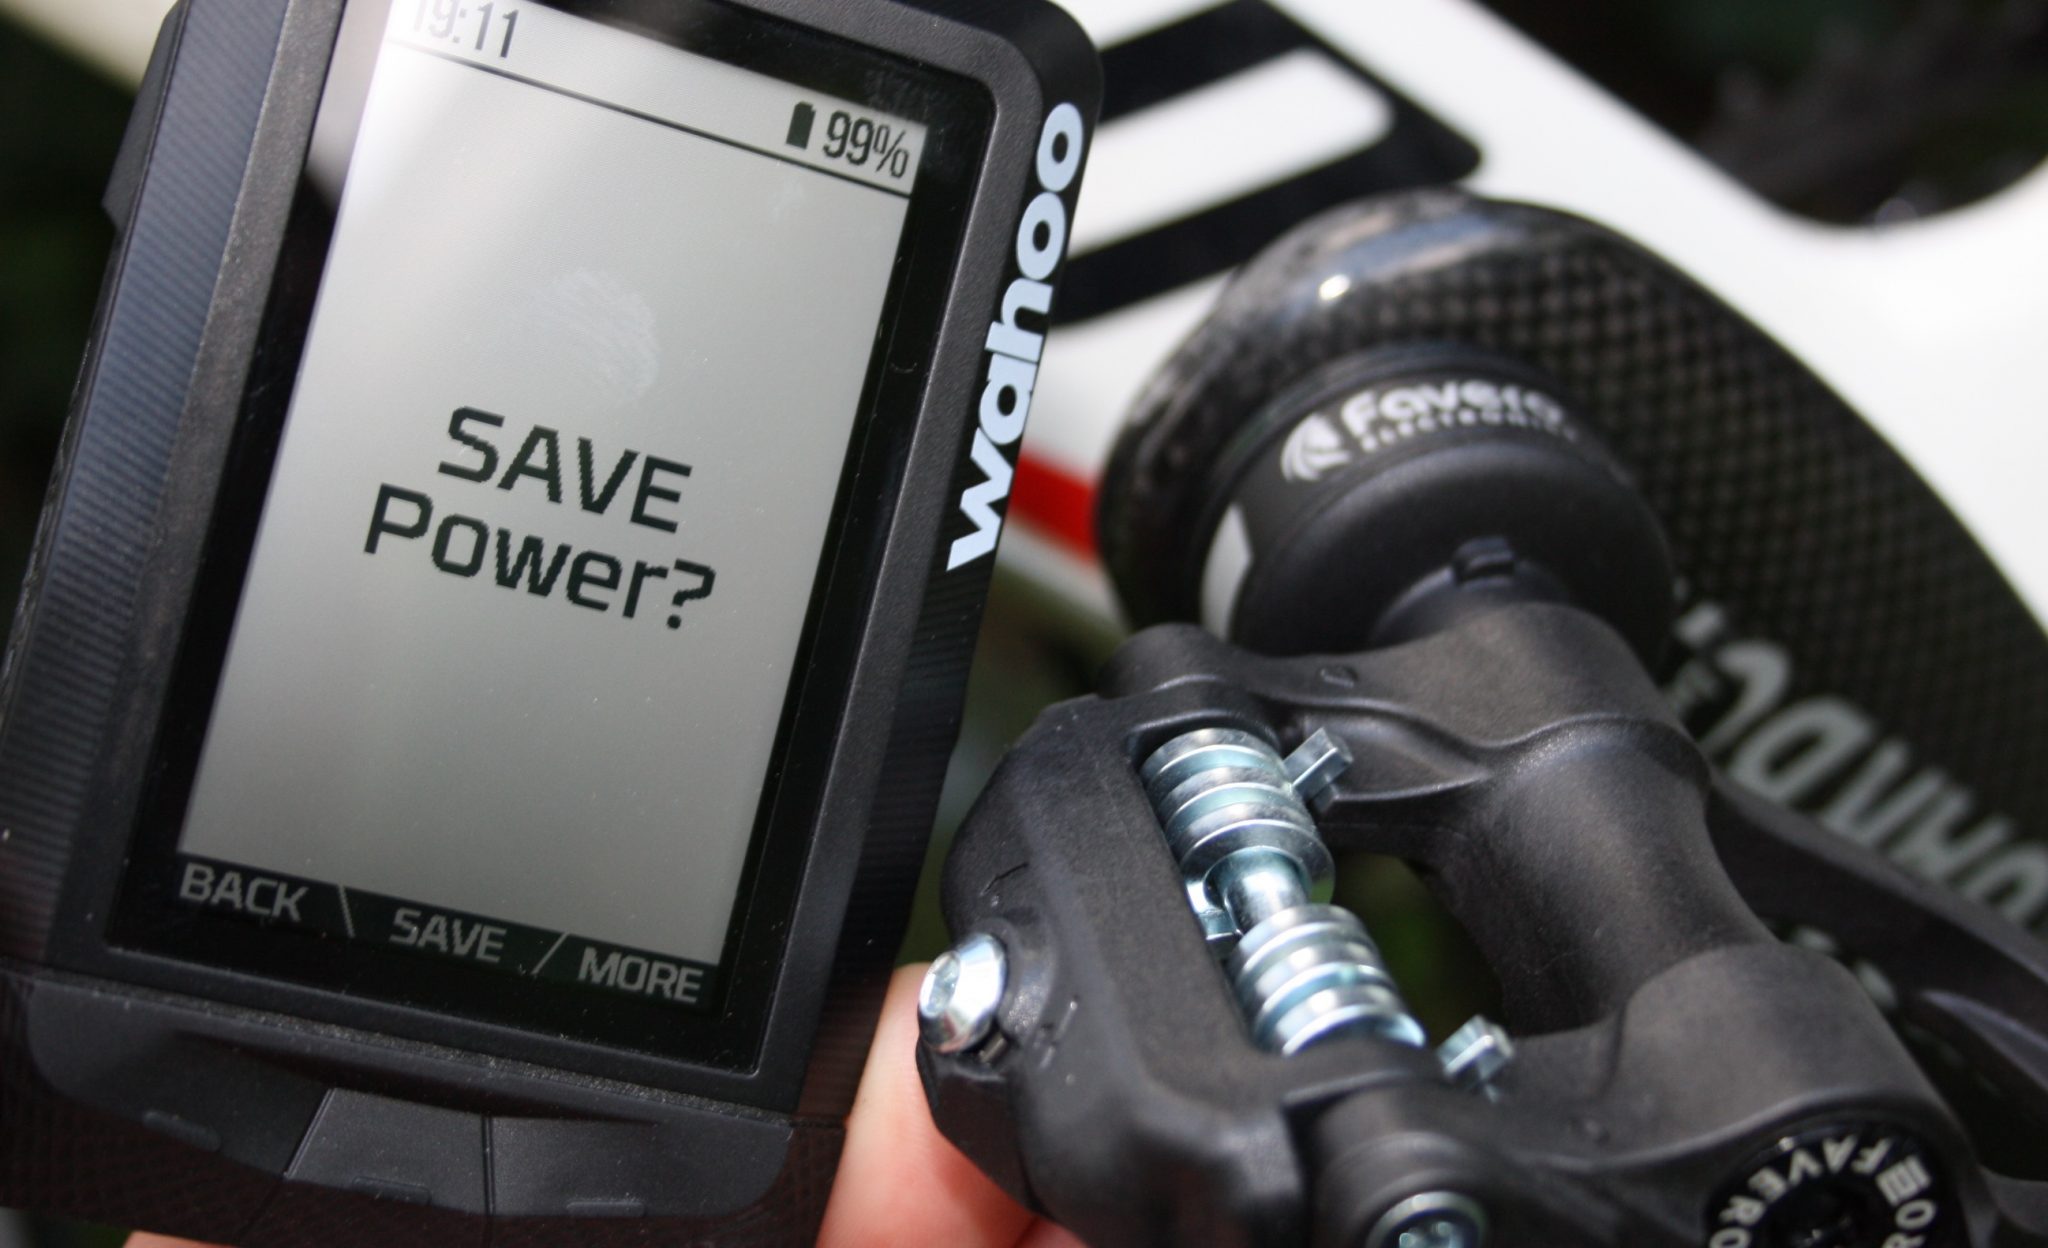
With the WAHOO ELEMNT, shown above, and other devices like the Polar M460 you might find that when you add a power meter for the very first time, the device will automatically change some of the existing displays and include power metrics. Nice.
You can head off now for a ride but I’d RECOMMEND you calibrate the power meter first.
CALIBRATION & MAINTENANCE
The ASSIOMA is essentially self-calibrating. It even self-calibrates for temperature changes. It shouldn’t need any particular ‘servicing’ unless something is damaged
DAILY CHECKS
- A Pre-ride zero offset calibration might make you feel better. With your pedals vertical and not in contact with anything ensure that the bike is standing vertically, perhaps by leaning against a wall use your head unit/watch to perform a zero offset calibration. It takes about 5 seconds.
CHANGING BIKES / CRANKS / CHAINRINGS
- For a new installation the ASSIOMA performs an automatic initial calibration. Basically you just start pedalling and after about 10 revolutions power will appear. Once power readings appear on your unit the calibration is complete.
- You will also do the zero offset calibration
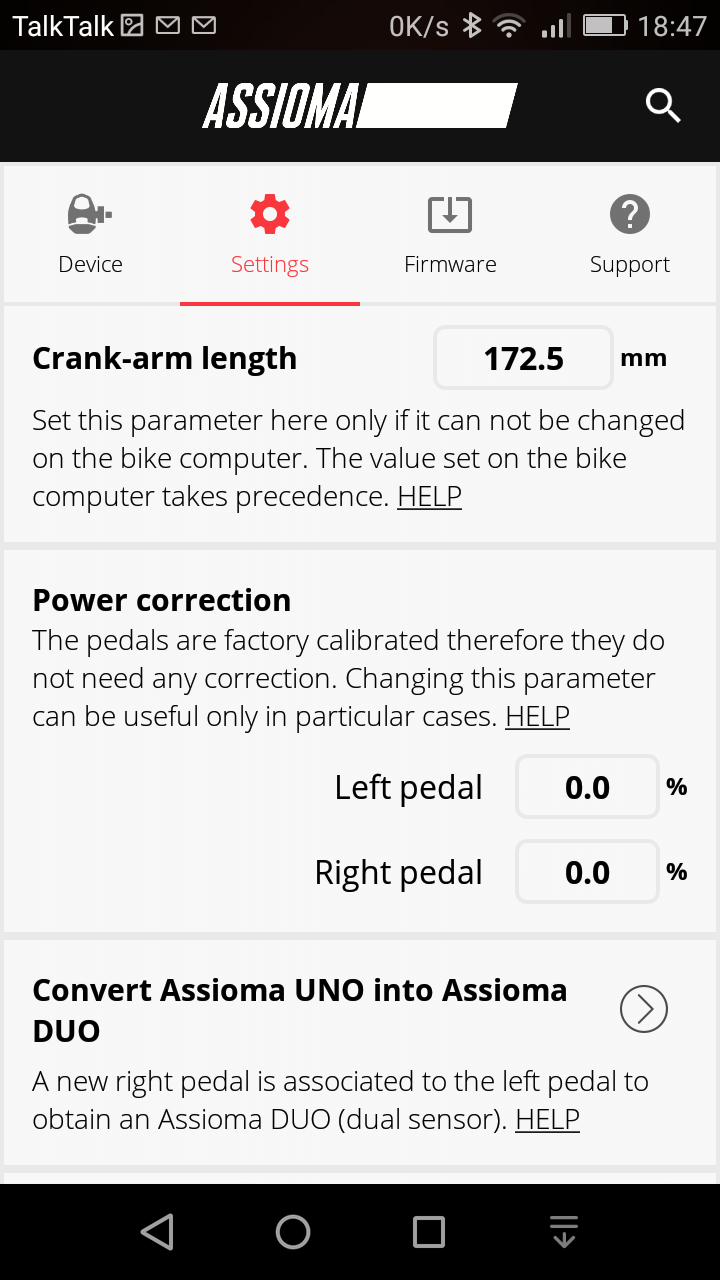
- Don’t forget to double-check and set the crank arm length in your cycling head unit to the same value.
- THEN Don’t forget to check and set the crank arm length in the ASSIOMA app (this MUST be done last)
UNUSUAL SCENARIOS
- Some bike computers/watches do not allow crank length to be set. You can make this setting on the pedals through the app.
- For the EARLIER BePro model, I used to recommend that users performed a Bi-annually check of the power balance calibration of your pedals. aka static torque verification.(Details here in section 2.1.12 for the earlier BePro but the principle applies). Favero assure me that this is NOT required for the ASSIOMA.
- Oval/elliptical chainrings appear to increase the power reading by 2-4% depending on the ovality. POWER CORRECTION settings on the app can adjust for that if you like.
- Indoor training on rollers might produce different power levels than on the road (Source: Favero) and, again, the app can be used to adjust for this via the POWER CORRECTION.
- Periodically you should also update the firmware. For the earlier BePro model there were few firmware updates. Perhaps a good sign of a well-engineered product? Again the firmware is updatable through the app. This is a much easier method than before where the firmware had to be carried out via a computer and some downloaded software.
Go Back to the main review for additional information including the accuracy results of the Favero Assioma
RESOURCES
Manual: https://goo.gl/HTQKSE
Data Sheet: https://goo.gl/AdTFjB
PowerMeterCity are in the USA and Wiggle in the EU
 ASSIOMA code for 10% discount – “the5krunner10“ ASSIOMA code for 10% discount – “the5krunner10“ |
Return to Favero Assioma review
. The Power Meter City (USA) and Wiggle (EU/UK) links both usually offer a 10% discount (edit Dec 2017: Power Meter City have temporarily stopped this discount in the USA due to adverse exchange rates.)
| Assioma code for 10% discount – “the5krunner10“ |
Reader-Powered Content
 This content is not sponsored. It’s mostly me behind the labour of love which is this site and I appreciate everyone who follows, subscribes or Buys Me A Coffee ❤️ Alternatively please buy the reviewed product from my partners. Thank you! FTC: Affiliate Disclosure: Links pay commission. As an Amazon Associate, I earn from qualifying purchases.
![]()
Just a quick thought the Assioma pedal bodies look insanely similar to the Xpedo thrust 8 ones…Does this imply that they are actually manufactured by Xpedo? Any chance for self-service parts being available?
yes you can take it to bits. I took a bepro to bits and they are the same. the online manual shows you all the bits
Thanks for the review. Would like to know how is ANT+ connectivity to the Forerunner 935 and the Wahoo Elemnt Bolt. My Stages has issues with dropouts for both. A known issue that Stages has relatively weak ANT+ signal. Would like to know if the Assioma suffers from the same.
just did the regular elemnt (+m460+edge 820) today and no dropouts with assioma that I can see on the elemnt. not looked at closely.
I can’t test every combo due to day job+other half job
Thanks very much. I recently migrated from the Fenix 5S to the 935 so having some worries about ANT+ signal. (935 has been working good so far but trying to be safe regarding my possible purchase of the Assioma.) Do let me know how the 935 does when you have the time. Thanks again!
Does these work with the polar v800
I seem to remember that it is dual BLE. do you want me to check for dual or just that it works? (I have a v800 somehwre)
Normally it should work (P1 are also dual BLE), but i prefer to be sure before i buy the assioma duo. thx in advance
hi Erwin
yes I just fired up the V800.
1. it pairs left power and prompts for right pedal pairing. I did both.
2. it asks for crank length
3. I quickly checked total power level against Edge 820…@100w (not my FTP 😉 ) both are similar.
looks good.
nb: the full review is now up: https://the5krunner.com/2017/08/22/detailed-review-assioma-power-meter-pedals-from-favero-aka-bepro-v2-0/
all that’s missing is the power comparisons which I am working on
if you could buy via this link (https://www.powermeter24.com/#a_aid=10052&a_bid=b0959465 )it supports this blog. thank you very much and please feel free to ask more questions
What is the pedal material? Are they plastic like Garmin vectors?
same sort of thing.
Hello,
Would you be able to explain how to connect a Garmin 1000 to the right pedal too? Currently mine will only find the left pedal and thus I have to double the reading. I was under the impression that the Garmin 1000 could receive and show L/R readings. I notice you don’t use that device, however you seem to be an expert on all things technical.
do you havbe the assioma DUO or UNO – uno is only one-sided
is the battery charged
what does the app say when connected.
it should just work, mine does.
favero support is cool.
try to pair ble rather than ant+ or vice versa
Hello,
Duo. The app finds both pedals, left shows Ant+ ID and right shows ID R. Doesnt say anything else. However Garmin 1000 can only find the left one. I don’t see an option on the Garmin for choosing ble or ant+ for pairing – where is that possibility?
I have also asked Favero support.
maybe borrow a friends cycling computer or watch. just for 5 mins. that way you can eliminate the cause…garmin or favero
Got it to work, thanks a lot for your help!
The Edge 1000 supports only ANT+ sensors.
yep, ty
1030 and fenix 5 support both protocols
Hello…I have been riding the DUOs for the last two months and everything is awesome except the cleat tension seems to be WAY too tight. I tried to adjust them to no avail. I am using the cleats that were supplied with the tension screws backed completely off and still have incredible difficulty clipping in and unclipping. Any thoughts?
I’ve seen a few comments about this.
Yes they are a bit tight, especially compared to Shimano.
I did NOT change the tension on the pedals for me and i use them A LOT.
They do work looser over time. probably as the cleat wears out from walking on it
I twist my right foot anticlockwise ie toe in, to unclip.
spray a bit of oil on your cleat (not ideal…try it)
seeing left pedal on garmin 1000 is correct behavior for ANT+ right pedal data is collected by right pedal..it is explained in the manual how connection works…
Alright, I know this is from over a year ago, but maybe you’ll still see this and answer this question: so I stupidly tightened on my Assioma pedals against the crank arms sans washer. I did not overtighten, I only tightened them with my 8mm Allen key until they were secure. I realized my mistake about fifteen minutes later (I had not ridden on them like that) and removed the pedals, then reinstalled them with washers in place. Would you reckon that I damaged them? I haven’t yet tested them on the road as my new bike is not fully set up, but they were detected by my computer and the lights seem to be flashing as normal. Any input would be helpful, thanks!
IDK
I guess you might be alright. the washer is to ensure a correct power reading as well as stopping what you did.
my guess is that its ok
the only way to know is to ask favero. I imagine you have invalidated your warranty.
I just threaded the pedals onto my ultegra 6800 cranks. it looks to me like the washers are not required in this case since there is a noticeable gap between the pod and the crank arm.
however, i can’t seem to complete a successful calibration
did i do something in the wrong order?
greased the pedal threads a bit
threaded the pedals on
attached the magnet chargers to get the battery levels up
connected the app with the pedals and activated the pedals
confirmed the firmware is at latest 3.0 version; says firmware is updated
bike is standing on a hub stand straight up
positioned cranks at vertical, drive side at 6 o clock
still charging
tap zero calibrate button
calibration error dialog pops up every time; please repeat process. tried straightening bike and tried again, always calibration error good grief sheesh, seemed to be going so smooth;y at first
do i need to pair with my bike computer first?
i should try to calibrate via the wahoo bolt and see if that goes well.
regards.
take it off charge.
pair with a device
calibrate with the device.
go for a ride with power 😉
calibrate before every ride…should take 5 secs